The A2 Tulip Card: A Practical Guide to Design, Printing, and Common Mistakes to Avoid
The A2 Tulip Card has become a favorite for everything from wedding invitations and bridal shower announcements to thank-you notes and save-the-dates. Its compact A2 size (4.25″ × 5.5″) feels substantial without being oversized, and the tulip motif adds a touch of elegance and freshness. But despite its popularity, many people stumble over seemingly small details that can turn a beautiful idea into a costly frustration. Whether you’re a first-time creator, a small business owner offering stationery, or a marketer planning a spring campaign, understanding these pitfalls will save you time, money, and disappointment. This guide focuses on the practical decisions you’ll face when working with A2 Tulip Cards—from choosing the right paper to ensuring your final product looks exactly as you envisioned.
What Exactly Is an A2 Tulip Card?
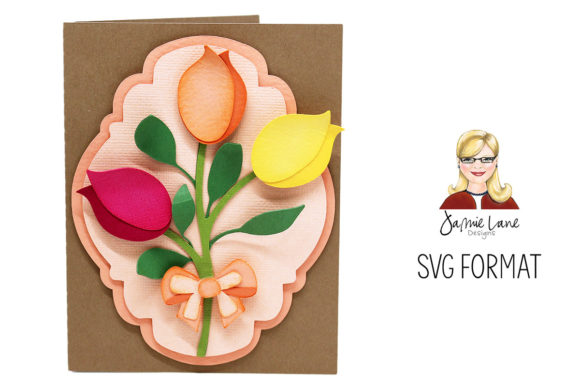
Let’s get the basics clear. An A2 Tulip Card is a greeting or invitation card built on the A2 standard (4.25 by 5.5 inches) and features a tulip design—either printed, embossed, foiled, or hand-drawn. The tulip theme often appeals to people celebrating spring events, but it also works for birthdays, Mother’s Day, or any occasion where a floral motif feels right. The card is typically folded, leaving a finished front panel of about 4.25″ × 5.5″ and an interior space for writing. Understanding this dimension is the first step because many mistakes start with assuming it’s the same as a standard 5″ × 7″ or an A6 card. It is not. The A2 size is narrower and taller, and using it interchangeably with other sizes leads to envelope mismatches and awkward layouts.
Mistake 1: Assuming A2 Means “Just a Normal Small Card”
One of the most frequent errors I see is people ordering envelopes and cards separately without double-checking the exact measurements. They see “A2” and think it’s interchangeable with “small,” but envelope and card makers sometimes use different standards. The true A2 envelope is 4.375″ × 5.75″, designed to hold an unfolded card of 4.25″ × 5.5″. If you buy a “4-bar” envelope instead, it will be too short. Similarly, if you design your card expecting to print borderless on a home printer, you may discover that your printer can’t handle the exact A2 dimension without cropping. The result: trimmed text, uneven margins, or cards that don’t fit their envelopes. The fix? Always verify the exact finished card size before designing. Use a template from a reputable stationer, and test print on plain paper first.
Mistake 2: Overcomplicating the Tulip Design for Print
Tulips look beautiful on a screen, but translating that digital beauty to a physical card can go wrong in several ways. The most common is using a low-resolution raster image that becomes pixelated when printed at A2 size. Another is including tiny details—like thin stems or intricate gradients—that get lost or muddy on cardstock. Keep the design clean. A vector-based tulip silhouette or a simple watercolor style works well because it reproduces predictably. If you insist on a highly detailed photograph or painting, order a proof from a professional printer who can show you exactly how it will look on the paper you’ve chosen. Also, avoid placing critical text near the edges; printers often need a small bleed margin, and trimming can shift the design slightly. A quarter-inch safety margin on all sides prevents headaches.
Mistake 3: Choosing the Wrong Paper Weight and Finish
The paper you select dramatically affects the card’s feel, durability, and how it handles writing. Many beginners pick 80 lb. text weight because it’s cheap, but it feels flimsy and may buckle under a heavy ink coverage. Others go for a glossy finish to make colors pop, only to discover that ballpoint pens smudge and fountain pen ink beads up. For an A2 Tulip Card, I recommend 100 lb. cover weight. It’s thick enough to feel premium but still folds cleanly. As for finish, consider a matte or linen texture if you plan to write on the inside. Glossy cards are fine for photo-only designs but nearly impossible to write on without a special pen. If you’re ordering professionally, ask for a sample swatch—feel the paper before you commit.
Mistake 4: Underestimating Printer Capabilities (or Lack Thereof)
Not all printers handle A2 cards well. Home inkjet printers often require you to feed cardstock manually, and they may not support borderless printing on heavy paper. The result: white borders you didn’t plan for, or misaligned double-sided prints. A common workaround is to design the card with intentional borders, so the white edges look deliberate. Another option is to use a local print shop that specializes in flat card printing—they can cut and score the cards perfectly. If you’re ordering online from a dedicated card printer, provide high-resolution PDFs with embedded fonts and the correct bleed area (usually 0.125″ extra on all sides). For small business owners selling A2 Tulip Cards, test multiple printers to find one that gives consistent color and sharp lines.
Mistake 5: Forgetting the Envelope Matters
The envelope is half the presentation. Yet I’ve seen beautiful A2 Tulip Cards placed into plain white envelopes that clash with the tulip colors, or worse, envelopes that are the wrong size because the user bought “A2 envelopes” that were actually for a different standard. Check that your envelope is A2-specific (4.375″ × 5.75″) and made of paper compatible with the card. If you’re hand-addressing envelopes with ink, test the envelope’s surface. Some recycled or textured envelopes feather ink and bleed. For a cohesive look, choose envelopes in a complementary tone—ivory, blush, or soft sage—and consider using an envelope liner with a subtle tulip pattern. And always order a few extra envelopes to cover mistakes during addressing.
Mistake 6: Misjudging Quantities and Costs
Ordering too few A2 Tulip Cards is a classic error, especially for events with a growing guest list. But ordering too many—or ordering custom-printed cards in bulk before you’ve settled on a final design—wastes money. My advice: start with a digital proof and order a small test batch of 10 to 15 cards. Evaluate the print quality, color accuracy, and paper feel. Then multiply your guest count by 1.1 (10% extra) and add 5 to 10 cards for keepsakes and testing. Also factor in the cost of envelopes and postage. A2 cards need an extra ounce stamp if they’re heavy or come with an enclosure card. Check the postage rate online before buying stamps.
Mistake 7: Overlooking the Writing Experience
The interior of the card is where your message lives, but many people design the front and forget to ensure the inside is comfortable to write on. If the card has a coated interior or a heavy ink coverage, pen tips can skip or smudge. Test your pen on a sample. Gel and ballpoint pens work well on most matte stocks; fountain pens prefer uncoated or lightly sized paper. If you’re giving the card as a gift or selling a pack, include a note about writing recommendations. Small business owners can increase customer satisfaction by adding a small card of suggested pen types inside the packaging.
Better Approaches: What to Prioritize Before You Start
Before you finalize your A2 Tulip Card, run through this checklist:
- Confirm exact dimensions for both card and envelope. Write them down.
- Choose a design style that prints reliably—vector art, simple watercolor, or a minimal line drawing.
- Select paper stock that balances weight (100 lb. cover ideal), finish (matte or linen for writing), and cost.
- Print a proof on the actual stock you plan to use. Adjust colors and margins accordingly.
- Order envelopes from the same supplier or one that guarantees A2 compatibility.
- Build in a small buffer (10–15% extra cards) and test your writing tools on a scrap.
For entrepreneurs and marketers, this attention to detail translates into fewer returns, happier customers, and a product that looks professional. For personal use, it means receiving compliments instead of complaints about odd sizes or illegible text.
Realistic Examples of Good vs. Poor Choices
Consider two scenarios. Poor choice: Sarah designs a tulip card in Photoshop using a pixel-based image at 150 DPI. She orders 100 cards from an online printer that doesn’t offer a proof. The printed tulips look fuzzy, the borders are uneven, and the envelopes are slightly too small because she assumed “A2” was a universal code. She ends up reordering at double the cost.
Better approach: James uses vector software to create a clean tulip outline. He downloads an A2 template from his printer’s website, ensures 0.125″ bleed, and orders a sample pack of five cards beforehand. He tests a few pens on the linen cardstock and picks a matching blush envelope. His final order of 50 cards arrives perfect, and he spends less overall than Sarah did on her first failed batch.
Final Thoughts: The A2 Tulip Card Done Right
The A2 Tulip Card is a versatile and charming choice for any occasion, but its success hinges on the details you pay attention to before hitting “print.” By avoiding the common mistakes—size confusion, poor paper selection, ignorant printer limits, and careless envelope buying—you can produce cards that look polished and feel satisfying to hold and write on. Whether you are a hobbyist, a small business owner, or a marketing professional, applying these corrections will elevate your final product and save you from costly do-overs. Start with a clear plan, test as you go, and let the tulip design speak for itself.